Create a project and add the tracker
A project is one website or app. Each project has its own snippet, keys, and data. The owner and admins can create projects.
1. Create a project
Section titled “1. Create a project”- Open Projects in the sidebar. The list shows each project with its last event, its allowed sites, how long it keeps events, and when it was created.
- Select New project.
- Enter a Name, such as “Main site”.
- Under Allowed sites, enter your site’s hostnames, one per line, such as
example.comandwww.example.com. You can also add them later. - Select Create project.

The new project opens on the Install tab of its Settings.
2. Allow your site’s hostnames
Section titled “2. Allow your site’s hostnames”The project accepts events only from pages on its allowed sites. A project without any accepts nothing: the Install tab then says “No allowed sites yet”, and the Projects page says “None: events are refused”.
To change the list, open the project’s Settings, then the General tab. Under Allowed sites, enter one hostname per line:
- Matches are exact.
example.comdoes not allowwww.example.com. List both if both serve pages. - Wildcards such as
*.example.comare not supported. List each subdomain. - You can paste a whole address, such as
https://example.com/pricing. The form keeps only its hostname. - Internationalized names are stored in their ASCII form:
bücher.examplebecomesxn--bcher-kva.example. - To test on your own computer, add
localhost.
Then select Save changes. The form follows the save rule. A change applies within a minute.
3. Add the snippet
Section titled “3. Add the snippet”The Install tab has the snippet to copy:
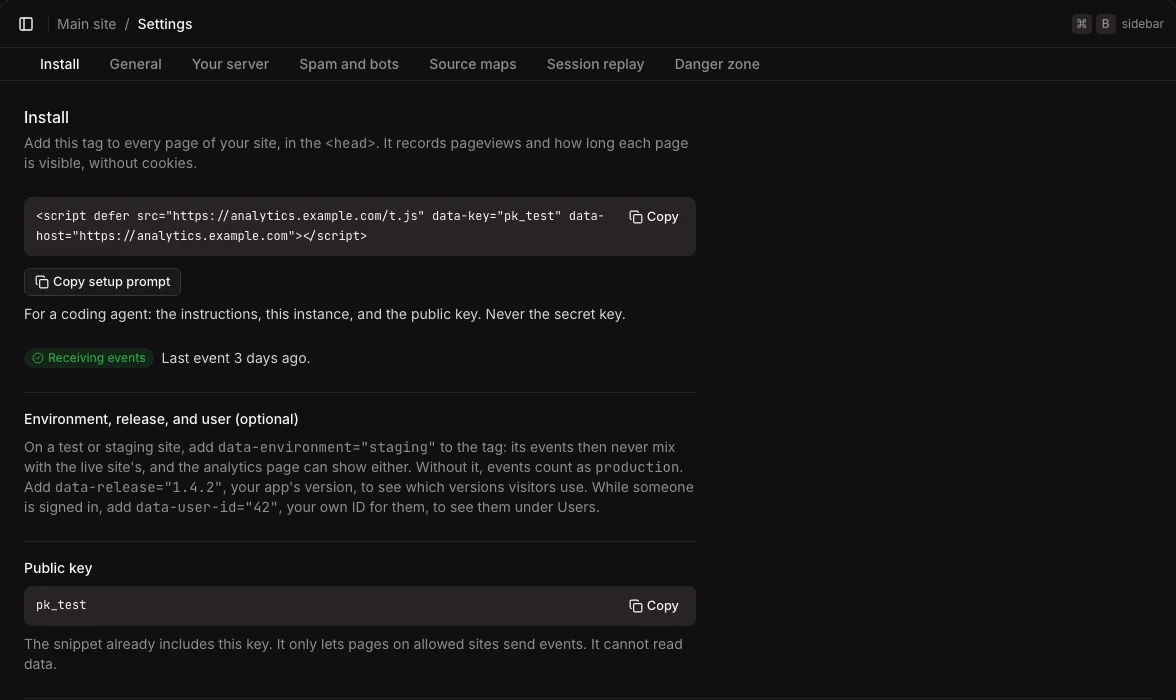
<script defer src="https://analytics.example.com/t.js" data-key="pk_…" data-host="https://analytics.example.com"></script>Copy it into the <head> of every page of your site. In most sites that is one layout or template.
srcloads the tracker from your instance.data-keyis the project’s public key. It is not a secret: it only lets pages on the allowed sites send events, and it cannot read data.data-hostis where the events go.- Keep
defer, so the script does not hold up the page.
The tracker records pageviews and how long each page is visible. It sets no cookies and stores nothing on the visitor’s device. It also reports JavaScript errors and measures Web Vitals. To record where visitors click and how far they scroll, see Heatmaps. The tracker reference lists every attribute.
Under the snippet, “Environment, release, and user (optional)” names three attributes you can add later:
data-environment="staging"on a test or staging site, so its events never mix with the live site’s. See Environments and releases.data-release="1.4.2", your app’s version.data-user-id="42", your own ID for the signed-in user. See Name signed-in users.
If you use a coding agent, Copy setup prompt copies instructions for it with this instance’s address and the public key. It never includes the secret key. See Get started.
4. Check that events arrive
Section titled “4. Check that events arrive”Until the first event arrives, the Install tab shows Waiting for the first event. It checks again every 10 seconds.
Open your site in a browser. Within about 10 seconds the badge turns into Receiving events, with the time of the last event. Then open Web analytics in the project’s menu to see the visit.
If nothing arrives:
- Check the hostname. The page’s hostname must be in the allowed sites exactly. Events from another hostname are refused with 403, which you can see in the browser’s network tools.
- Use a normal browser. Visits from
curl, headless browsers, and servers in a cloud are ignored as bots. See Spam and bots. - Check your blocked addresses. If your own address is in the project’s “Blocked addresses”, your visits are ignored.
- Look in the browser’s console. The tracker writes a warning there when
data-keyordata-hostis missing, or whendata-environmentis not valid.